Deployment
We have a number of different environments we can deploy code to, listed here.
Deploying to a specified environment
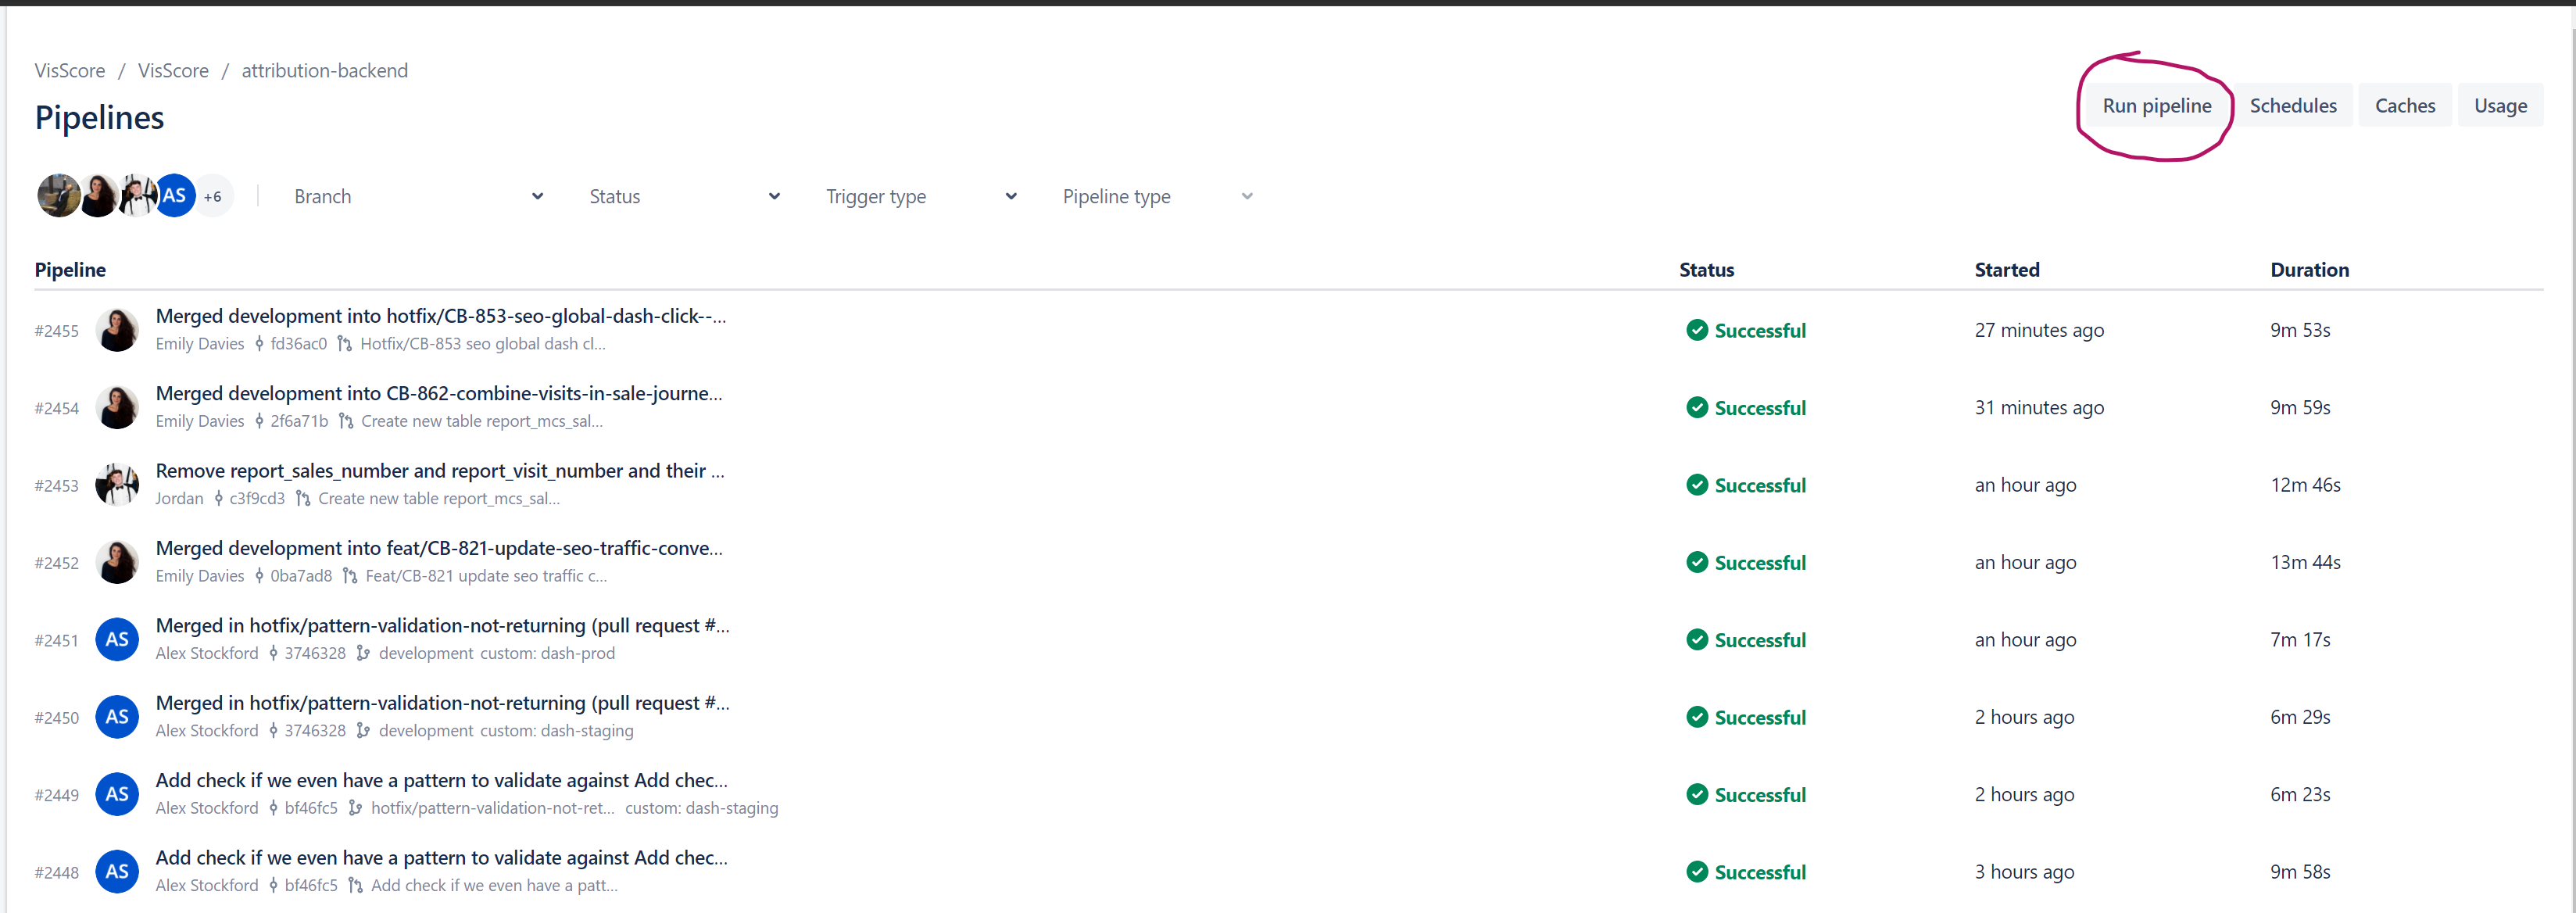
From this page you can run one of our pipelines. Each pipeline is associated with an environment as listed below.
How-to guide:

Step 1: click the button highlighted above.

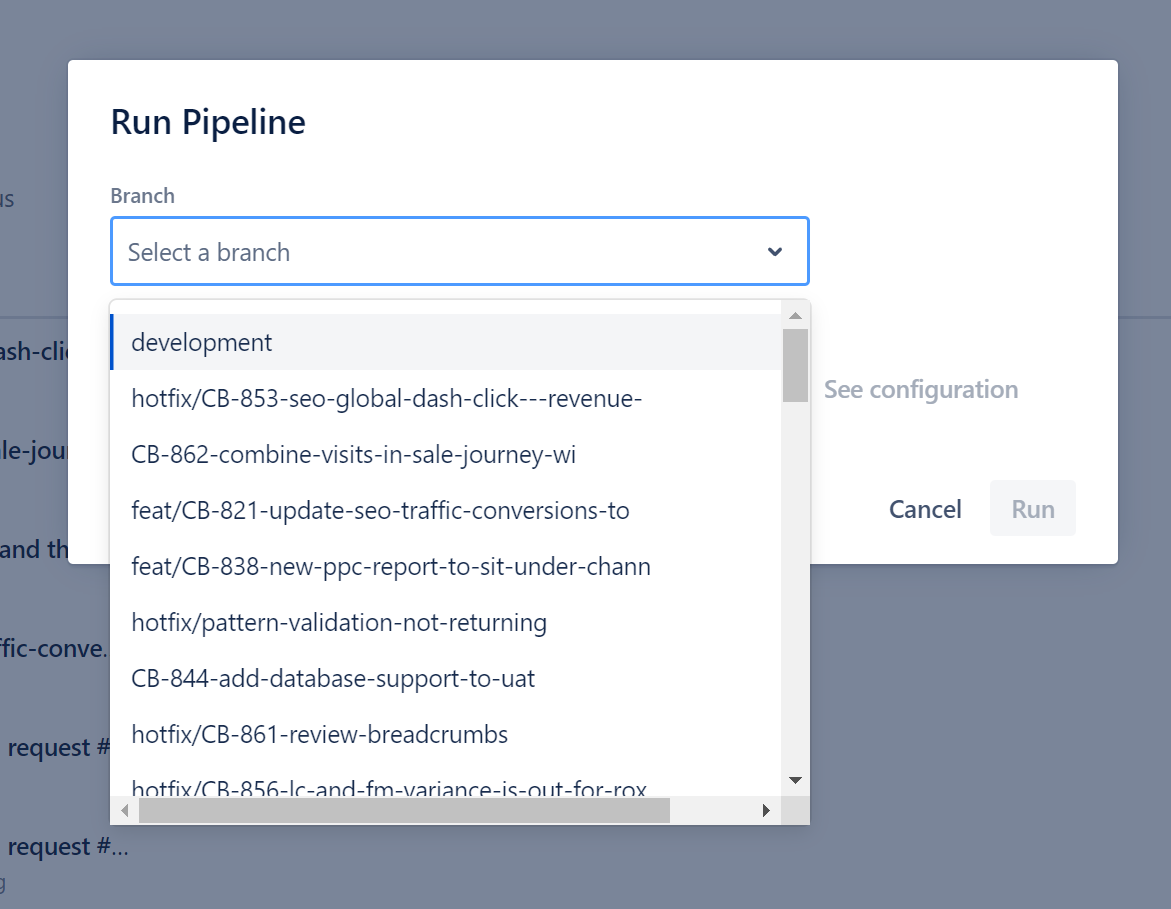
Step 2: select the branch you wish to deploy. This will normally be development when deploying to live environments, but could be any branch when deploying to a Staging or UAT environment.

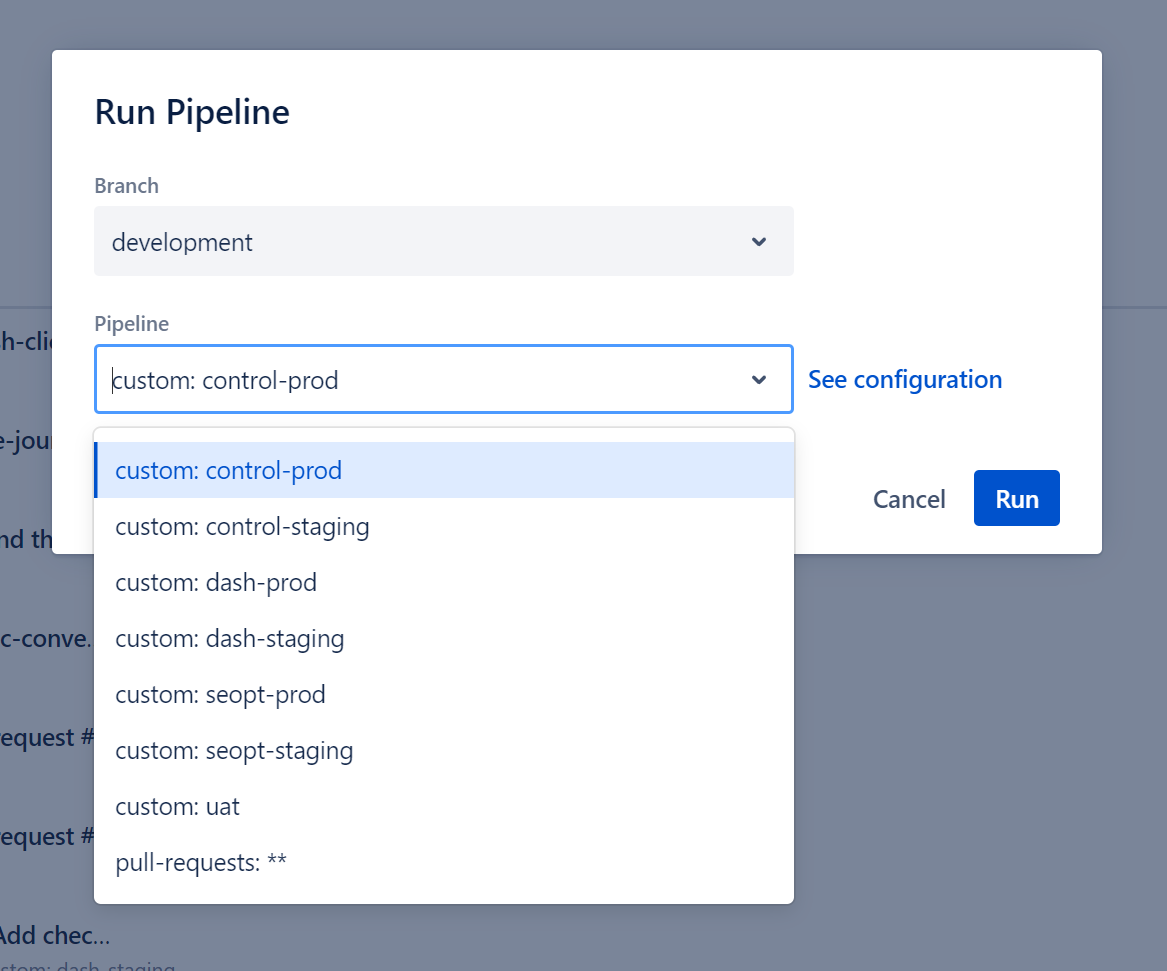
Step 3: select the environment you wish to deploy to, and click Run.

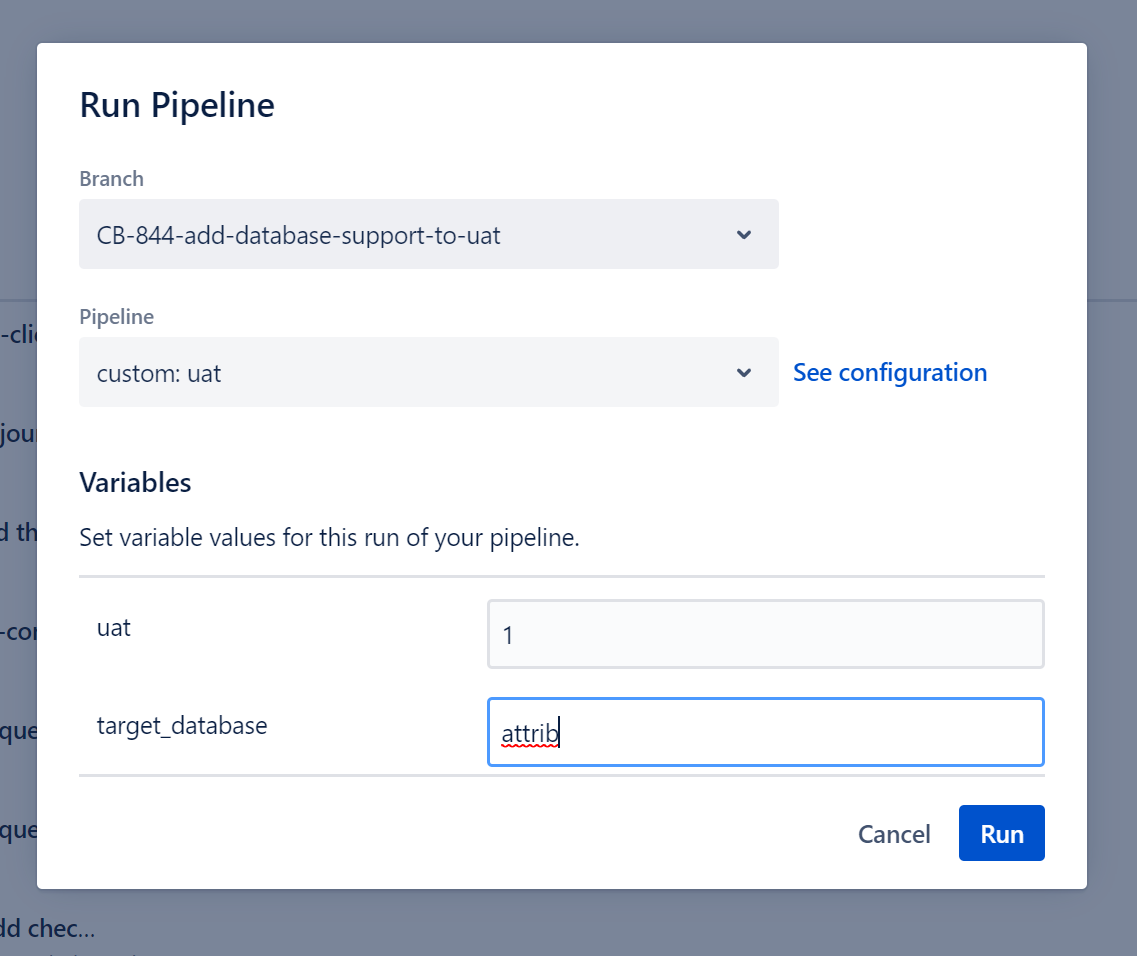
Step 3.5: if you are deploying to a UAT environment, please specify which one (1-2) you wish to deploy to, and which attrib database you wish to target. See below for more information.
Caution
When specifiying a database, you should specify your devname_attrib database and not your devname_attrib_client database.
Environments
Staging
More correctly called dash-staging, this ia a staging environment for our dashboard and can be deployed to by anyone using the process above.
Staging-control
The control box associated with all of our staging environments. Note that this includes the UAT environment described below. This too can be deployed to be anyone.
Production
This is our production environment for our dashboard. This can only be deployed to by admin users.
Production-control
As above, the control box associated with our production dashboard. Can only be deployed to by admins.
Staging-Seopt
Seopt is a central database we use to pull from API resources that are shared across client accounts. Then the data is accessed, processed and inserted into client databases by a Python script, usually called by one of our overnight batch jobs. This instance is our staging environment so we can test new API integrations. Can be deployed to by anyone.
Production-Seopt
As above, but for the live environment. This can only be deployed to by admins.
UAT
UAT environments are essentially copies of the Staging environment above. Differing slightly from the others, there are actually three UAT environments attached to this pipeline. When running the pipeline you will be asked to specify which environment you wish to deploy to; choosing 1 or 2. Your changes will then be accessible at uat1.withcubed.com, where 1 is the number you chose. Anyone can deploy to UAT environments.
You will also be asked to specify the attrib target database with which you would like to associate the environment. Attrib databases store configuration for which accounts (and therefore which client databases) should be accessible by a given environment. The default is simply attrib, which is the same database that Staging is configured to use. So if you use the default value, your frontend changes will be deployed to your chosen UAT environment backed by the normal staging database.
However if you have written a feature that requires specific data to test or demonstrate, you can pass in your local attrib database name (or any other) in order to associate the environment with a different database. For example, you could pass in devname_attrib as the database to use, and the staging environment would use devname_attrib for its config and associated accounts, essentially mirroring your local development environment but in a way that is accessible to others. This is especially useful where your feature contains significant or multiple Django migrations that might irrevocably change a database; it is far easier to repair or recover your private database than it is a shared one!
Connection timed out when running UAT pipeline?!
If you run a UAT pipeline and you face an error like 'Failed to connect to the host via ssh: ssh: connect to host <hostname> port 22: Connection timed out, this is likely due to bitbucket updating their pool of IP addresses for their build agents. You can find the latest IP addresses here. You will need to update the firewall rules inside the security group bitbucket-pipeline-ssh.
attrib vs attrib_client
It might seem counterintuitive to pass in the name of your devname_attrib database when all the data you want to review is in devname_attrib_client. However as above, our attrib databases hold all of our client information such as users, passwords, account data and so on. From this database, we can connect to whatever client database (eg devname_attrib_client) we wish, and this will be done automatically for you from the data held in devname_attrib.attrib_account.connection.