Developing on PyDCS
Introduction
This short guide should give you everything you need to start developing on the DCS locally.
Setup
First, you will need to clone the project, and run vagrant up for the first time. Ensure you are on the development branch for the latest good config.
You will need to add a .backend.yml file to the project root folder before running vagrant up to give the ansible script the information it needs to build the project successfully. This should look similar to the below:
dcs_database:
  protocol: tcp
  address: <<database_endpoint>>
  name: <<username_attrib>>
  port: 3306
  user: <<username>>
  pass: <<password>>
sqs_access_key_id: <<sqs_access_key_id>
sqs_secret_access_key: <<sqs_secret_access_key>>
Ask your manager for the values you should use.
Once the machine has come up, you should see a message similar to the below:
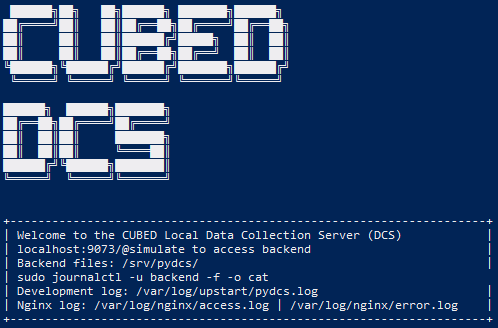
As you can see, this message gives you the default url for accessing the DCS frontend: localhost:9073/@simulate. Here you will see a wide variety of parameters that can be passed by the visscore tag to the DCS for processing.
Making a request
So lets try a hit to the DCS via the visscore tag. Before that you may want to open the logs to see your hit being processed. tail -f /var/log/pydcs/dcs_json.log will do that for you.
Next, in your browser, select visscore.tag.js as the Tag and Client 1 as the Account, and hit the orange 'Send' button on the right-hand side of the page.
The logs should now show some output that shows your hit being processed - you should see info messages stating that a new visit and visitor have been created. And that's it - a successful insert has taken place!
What just happened?
When we made a request to the DCS with our data via the @simulate page, a variety of data was serialised and sent to the server. There, the hit was assigned a visitor ID (vid) and a session ID (sid), both of which were returned to the page and should be displayed for you under the 'Response' tab.
Take a look at your database (yourname_attrib_client) on the staging server (via HeidiSQL). In attrib_visitor you will see data similar to the following:
| id | token | first_visit | last_visit |
|---|---|---|---|
| 1 | 9b613726dead436bad172f3038675ef6 | 2020-01-01 00:00:00 | 2020-01-01 00:00:00 |
| 2 | d2e748fd47884899a6bb58110666ab93 | 2020-01-01 00:00:00 | 2020-01-01 00:00:00 |
| ... | ... | ... | ... |
| 34 | b311d4b53ea6438f8058a9ec065b4668 | 2021-06-24 10:45:22 | 2021-06-24 10:45:22 |
In this example table, rows with ID 1 and 2 are pre-populated in the table as test data. ID 34 is your visitor, showing the first and last times you visited the site. The token is your unique visitor token and is used to track your activity wherever the visscore tag (and others) are live.
In attib_visit, you will also see an entry corresponding to your visit. This will also have a unique token and a pattern_id as well as a visitor_id that foreign keys back to the entry in attrib_visitor above.
| id | visitor_id | token | referrer | views | first_visit | last_visit | pattern_id |
|---|---|---|---|---|---|---|---|
| 1 | 1 | fa16cbdeffd44a888f5a487041fa6ebf | www.google.com | 4 | 2020-01-01 00:00:00 | 2020-01-01 00:00:30 | 2 |
| ... | ... | ... | ... | ... | ... | ... | ... |
| 69 | 34 | 9b53d3822a6342ea969c3016fff5156b | 1 | 2021-06-24 10:45:22 | 2021-06-24 10:45:22 | 9 |
The pattern_id foreign keys back to attrib_pattern. Here you should see a number of default patterns, each with a referer_id. The pattern we were caught by is the default catch-all pattern, {\s*} - whitespace. This is because we didn't enter anything in the 'Referer' field on @simulate. We can add whatever patterns we like here and they will be caught by the DCS. Remember that when adding a pattern it is important to ensure the updated field is set to today/now.
| id | referer_id | pattern | active | created | updated |
|---|---|---|---|---|---|
| 1 | 1 | *direct* |
1 | 2020-01-01 12:00:00 | 2020-01-01 12:00:00 |
| 2 | 2 | *seo* |
1 | 2020-01-01 12:00:00 | 2020-01-01 12:00:00 |
| 3 | 3 | *ppc* |
1 | 2020-01-01 12:00:00 | 2020-01-01 12:00:00 |
| 4 | 4 | *affiliates* |
1 | 2020-01-01 12:00:00 | 2020-01-01 12:00:00 |
| 5 | 5 | *display* |
1 | 2020-01-01 12:00:00 | 2020-01-01 12:00:00 |
| 6 | 6 | *email* |
1 | 2020-01-01 12:00:00 | 2020-01-01 12:00:00 |
| 7 | 7 | *shopping* |
1 | 2020-01-01 12:00:00 | 2020-01-01 12:00:00 |
| 8 | 8 | *other* |
1 | 2020-01-01 12:00:00 | 2020-01-01 12:00:00 |
| 9 | 1 | {\s*} |
1 | 2021-06-24 10:13:02 | 2021-06-24 10:13:07 |
Each referer_id we saw earlier links back to attrib_referer. This has 8 default entries which we can use to link our patterns back to. This is important because it allows us to show which channel each hit to a client's site is coming from. Here, we used the Direct channel as we didn't add anything to the 'Referer' field. In the table above, you will see that the referer_id of row 9 is set to 1 - this corresponds with the Direct channel below.
| id | name | active | created | updated | colour |
|---|---|---|---|---|---|
| 1 | Direct | 1 | 2020-01-01 12:00:00 | 2020-01-01 12:00:00 | 13375200 |
| 2 | SEO | 1 | 2020-01-01 12:00:00 | 2020-01-01 12:00:00 | 13375200 |
| 3 | PPC | 1 | 2020-01-01 12:00:00 | 2020-01-01 12:00:00 | 13375200 |
| 4 | Affiliates | 1 | 2020-01-01 12:00:00 | 2020-01-01 12:00:00 | 13375200 |
| 5 | Display | 1 | 2020-01-01 12:00:00 | 2020-01-01 12:00:00 | 13375200 |
| 6 | 1 | 2020-01-01 12:00:00 | 2020-01-01 12:00:00 | 13375200 | |
| 7 | Shopping | 1 | 2020-01-01 12:00:00 | 2020-01-01 12:00:00 | 13375200 |
| 8 | Other | 1 | 2020-01-01 12:00:00 | 2020-01-01 12:00:00 | 13375200 |
Finally, attrib_page shows the request you just made and where it came from - localhost:9073.
attrib_page
| id | visit_id | url | scheme | username | password | host | port | path | query | fragment | created |
|---|---|---|---|---|---|---|---|---|---|---|---|
| 1 | 1 | https://www.client.com/ | https | www.client.com | 443 | / | 2020-01-01 00:00:00 | ||||
| ... | ... | ... | ... | ... | ... | ... | ... | ... | ... | ... | ... |
| 89 | 69 | http://localhost:9073/ | http | localhost | 9073 | / | 2021-06-24 10:45:22 |
Common debug errors
If you have no pattern set up in attrib_pattern to catch '' as a referrer, you will likely see errors in your DCS logging. Fortunately the fix is simple - you can add a pattern to attrib_pattern manually, with the value {\s*} as we saw earlier to catch all whitespace. This should result in your hit being caught and processed as above.