Setting up the Development Environment
Clone the Attribution Backend Repository
-
Download and install SmartGit
-
Navigate to
https://bitbucket.org/yardcardiff/in the browser, and locate theattribution-backendrepository.
-
Click on 'Clone' at the top right-hand side of the screen, and copy the given URL:

-
In SmartGit, go to Repository -> Clone, and paste the URL into the 'Repository URL' field under 'Remote Repository'.

- Be sure to remove the 'git clone' command from the beginning of the copied URL.
-
Press 'Next' twice, choose a path for the local directory, for example
D:\attribution-backend, then press 'Finish'. -
You will now have a local copy of the repository in your chosen local directory.
-
At this time, our most up-to-date branch is the
developmentbranch, as opposed tomaster. You will need to check out this branch before continuing. In SmartGit, find thedevelopmentbranch in the branch browser (you'll find it underorigin/development) and right click. Select Check Out from the context menu. -
You should now see something similar to the following in SmartGit.

Vagrant
-
Download and install Vagrant and Oracle VM Virtualbox.
-
Open the repository in a text editor (such as VSCode), and create a file called
.backend.ymlin the project root (in the same location as Vagrantfile), containing the following (ask your manager for the correct credentials):backend_database: protocol: tcp address: db address name: db name port: port user: username pass: password your_email: email address your_password: password of your choice -
Open your Terminal/Command Prompt, and navigate to your repository (e.g.
cd D:\attribution-backend). -
Type the command
vagrant up. This will create and start a Vagrant development environment for the project. If successful, you will be able to view the environment in Oracle VM Virtualbox:
-
Once the Vagrant development environment has finished setting up, you can navigate into it via ssh with the command
vagrant ssh
Debugging
The Django development server should start automatically when the Vagrant development server is started. If you need to check whether the Django development server is running, you can type the command sudo journalctl -u backend (ssh into the Vagrant development environment first).
Changes to Vagrantfile
If you make any changes to the Vagrantfile, such as adjusting the ports, you will need to restart the backend with the command sudo service backend restart after you have ran vagrant reload.
React
-
Navigate to the React/dashboard folder inside of your local repository
cd D:\attribution-backend\react\dash -
Run NPM install using
npm i -
Run NPM start using
npm start -
You should be able to access dashboard using http://localhost:3000
-
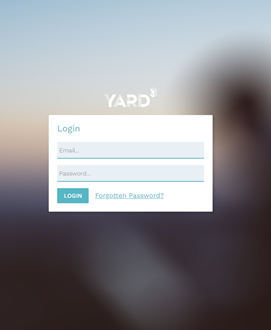
You can login into the http://localhost:3000 with the email and password that you set in the
.backend.ymlfile asyour_emailandyour_password.
Common Problems
Unable to login or 502 response in the console while logging in
This usually means that the backend/Django service has crashed and needs to be restarted. You can do this by logging into the vagrant box vagrant ssh and restarting the service sudo service backend restart.
Symlink error while npm install
When you try to run npm install from Vagrant terminal, you might face syscall symlink error. To troubleshoot this error open up any CLI terminal as a administrator and run vagrant up and then do vagrant ssh into your VM. Finally run npm install to install node packages.
-
You may also need to install Python 2.7 to install certain packages (
node-sass). Also ensure that both are added to your system path. ↩